Comprehensive Guide to integration with FBR DI System
Follow these mandatory steps within your FBR IRIS portal to formally nominate https://ezinvoice.pk as your Licensed Integrator and generate the secure tokens required to begin FBR Digital Invoicing compliance testing.
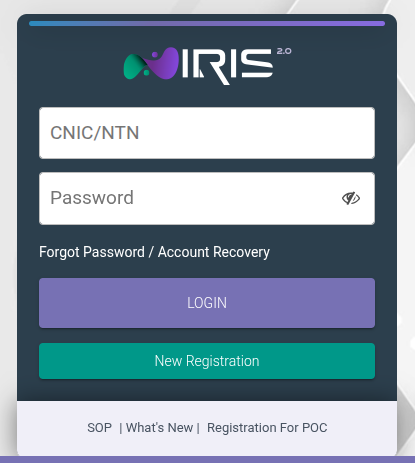
Step 1/6 Access your IRIS account
- Log in to the FBR IRIS account using your assigned CNIC/NTN and Password.
- Look for and click on the "Digital Invoicing" logo or link, typically found in the top navigation menu.

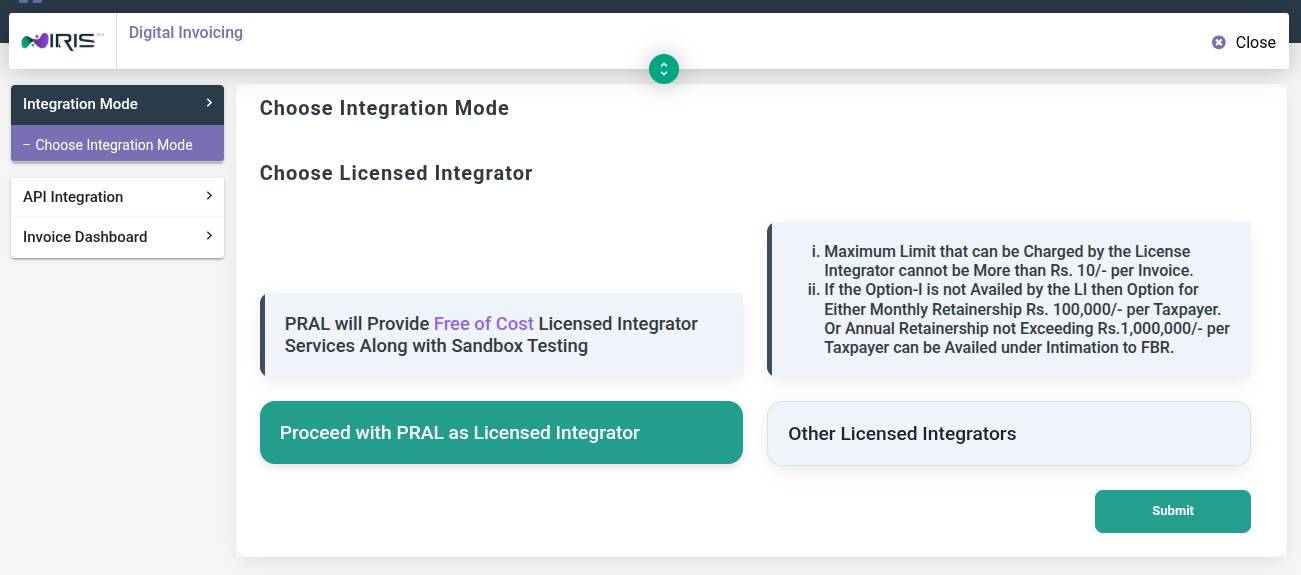
Step 2/6 Nominate PRAL as Licensed Integrator
- On the "Integration Mode" screen, select the option to 'Proceed with PRAL as Licensed Integrator'.
- Click Submit to confirm. The portal will automatically advance you to the 'Technical Details' tab to proceed with the API Integration.
Step 3/6 Register ezinvoice.pk Technical Details
Complete the following fields. This step formally registers ezinvoice.pk as the system responsible for managing your FBR e-invoicing submissions:
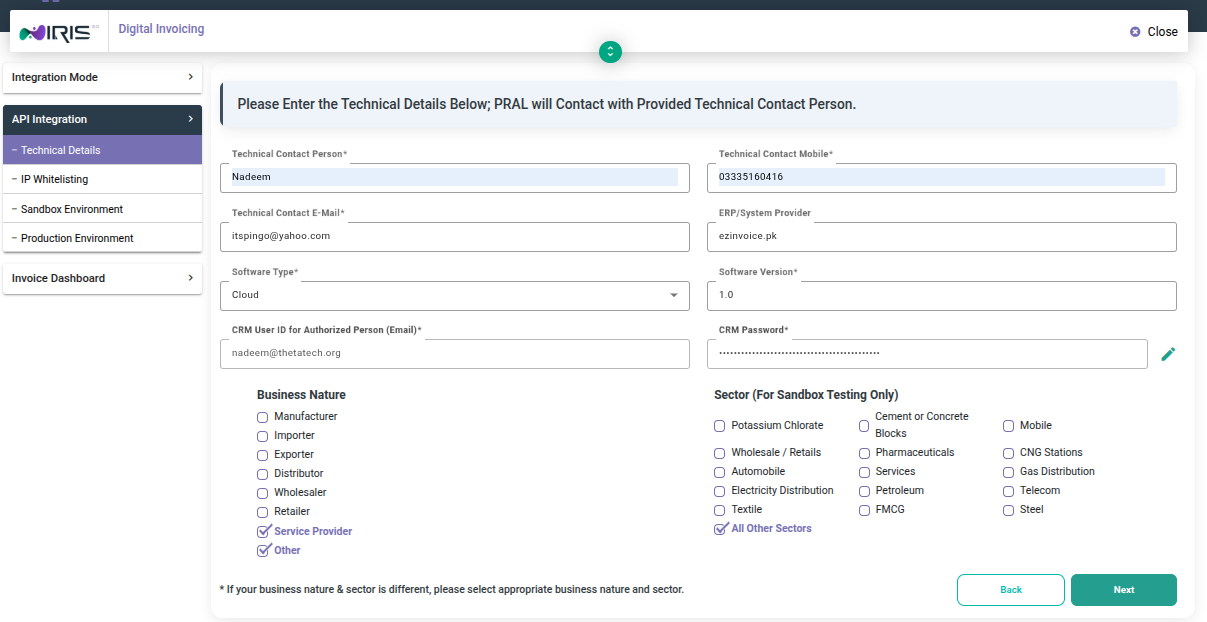
- Technical Contact Person/Mobile/E-mail: Provide the contact details for the person who manages your Digital Invoicing setup.
- ERP / System Provider: Crucial Step: Input
ezinvoice.pkhere. This links your FBR account directly to our service. - Software Type: Select
Cloud(as ezinvoice.pk is a cloud-based solution). - Software Version: Input
1.0. - CRM User ID (Email) & Password: These credentials are for the FBR-provided CRM system. Input a secure email and password and store them safely.
- Business Nature: Select all types that accurately describe your company's business activities.
- Sector (Sandbox Testing Only): Select only one sector. This choice determines the specific compliance scenarios (Sandbox Scenarios) that our software (ezinvoice.pk) must pass before your account goes live.
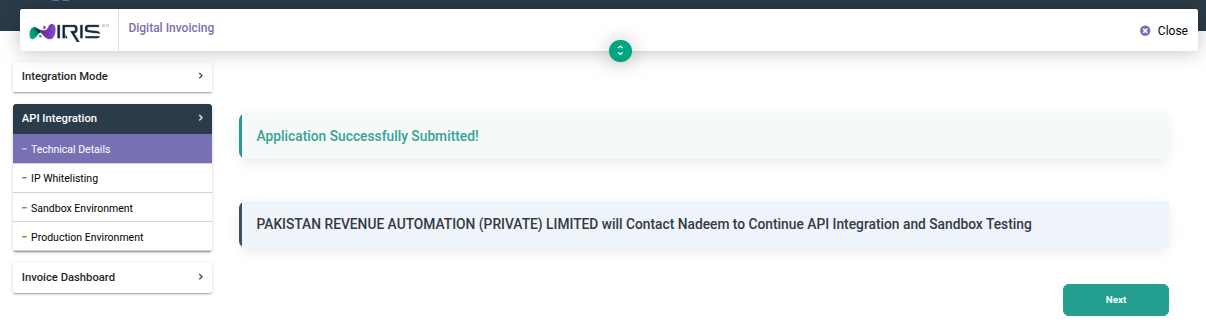
After checking all fields, click Submit. A message will confirm your application is successfully submitted. Click Next.
Step 4/6 IP Whitelisting for Secure Connection
IP Whitelisting is a security measure. You must specify the secure IP address of the ezinvoice.pk server to allow the FBR API to communicate with our system:
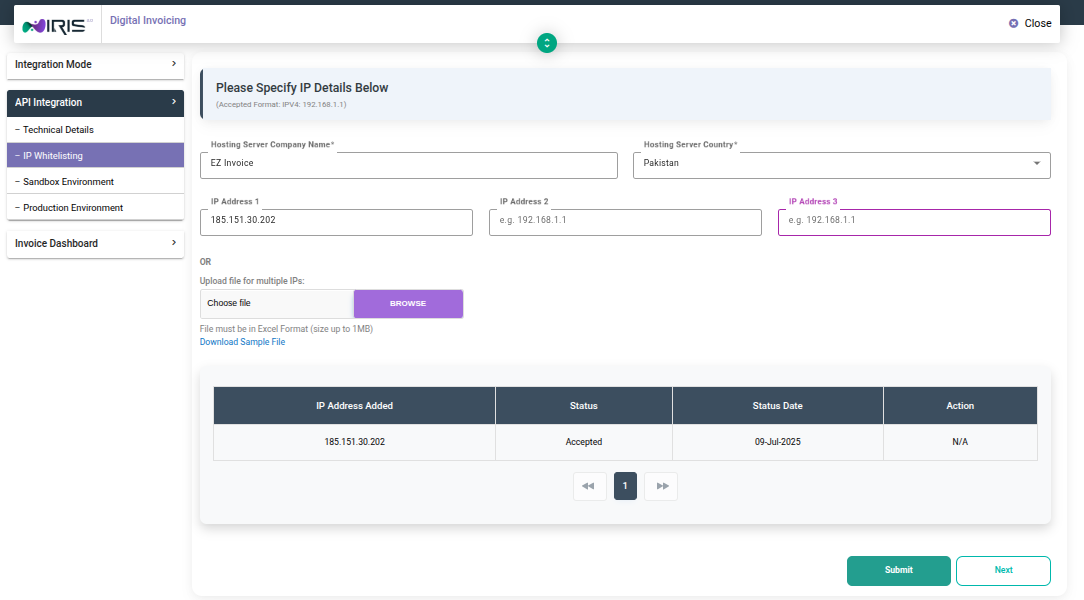
- Hosting Server Company Name: Input
EZ Invoice. - Hosting Server Country: Select
Pakistan. - IP Address 1: Input the official ezinvoice.pk IP address:
185.151.30.202Leave all other IP address fields empty. - Do not use the 'upload file' option as only one IP is required for the connection.
- Click Submit. The IP address will appear in the list below with an "Accepted" status.
- Click Next to move to the testing environment.
Step 5/6 Verification of Sandbox API Tokens
The Sandbox Environment is the designated area for ezinvoice.pk to run automated compliance tests. You must ensure the API access tokens are visible:
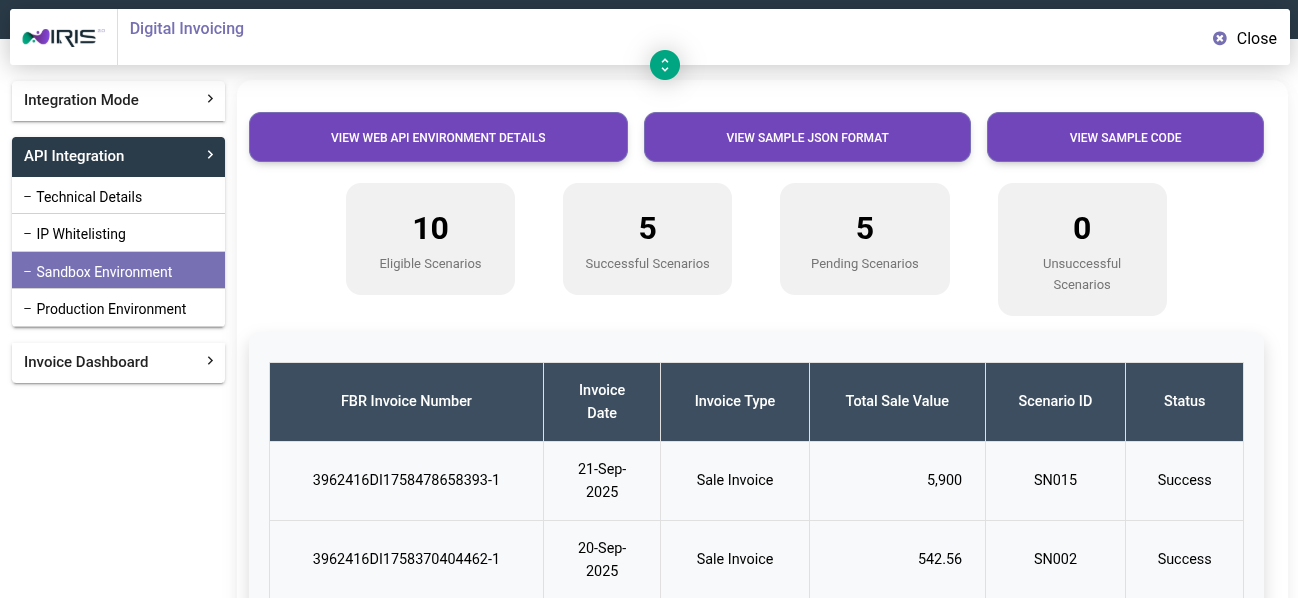
- Navigate to the 'Sandbox Environment' tab.
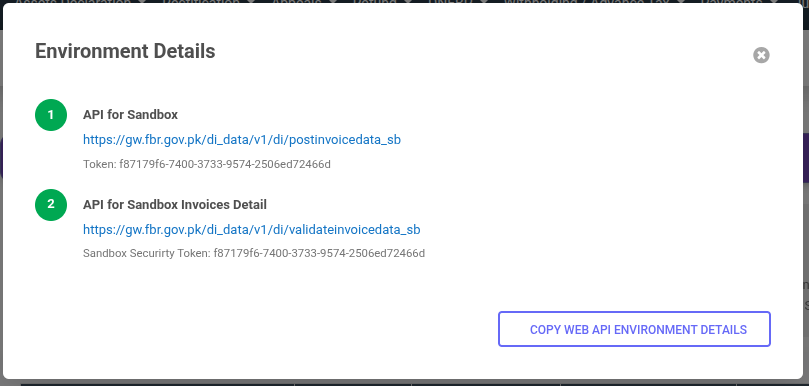
- Click the button: 'View WEB API Environment Details'.
- Confirm that the API for Sandbox and API for Sandbox Invoices Detail have active Token and Sandbox Security Token numbers issued. These tokens are the digital keys allowing ezinvoice.pk to commence the required scenario testing.
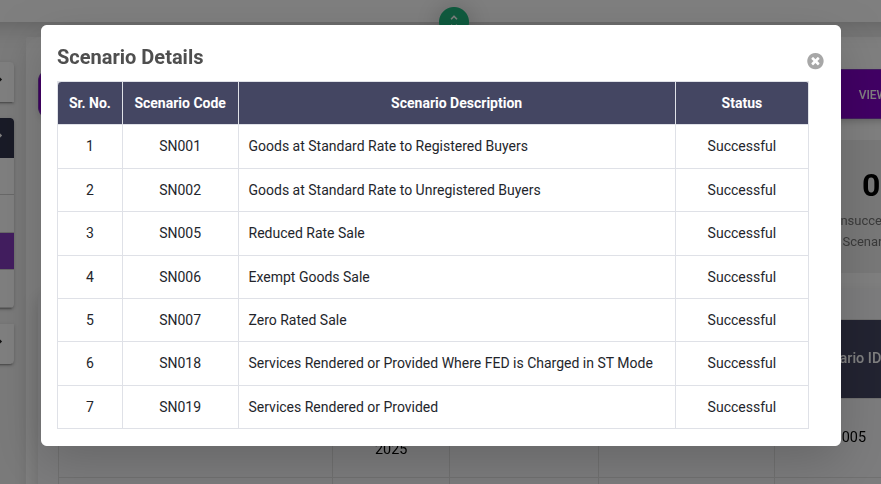
- Action Required: Once the tokens are issued, our system at https://ezinvoice.pk will automatically begin submitting and validating the required Sandbox Scenarios (e.g., Goods at Standard Rate, Exempt Goods Sale, etc.) to ensure your account is fully compliant.
Step 6/6 Production Environment Completion
After ezinvoice.pk successfully passes all mandated compliance scenarios, the system will automatically update the status:
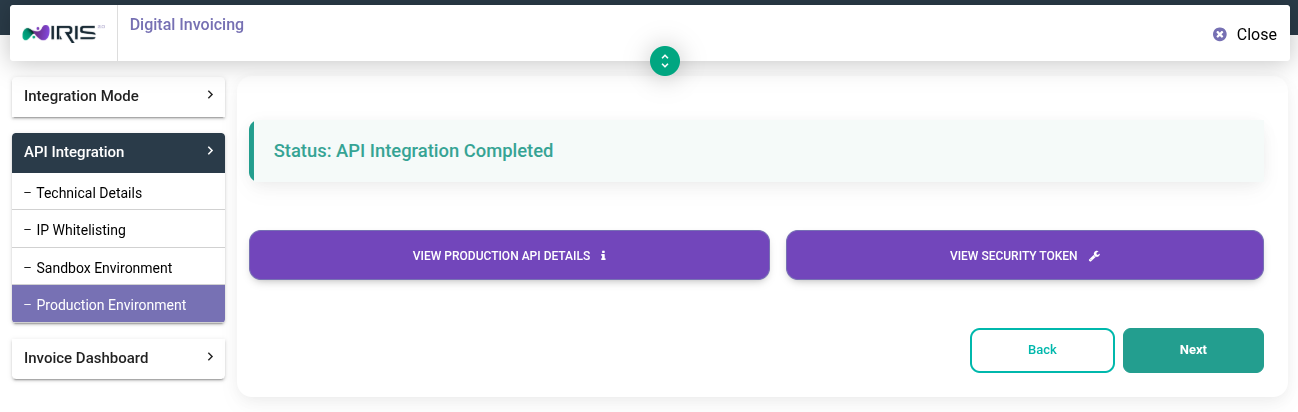
- Navigate to the 'Production Environment' tab.
- You will see two buttons of "View Production API Details" and "View Security Token".
- Production api details will show url when clicked.
- View security code button will show you assigned token that will be used in the software for sending live invoices to FBR digital invoicing system.
- Your account is now fully integrated and ready to submit live FBR Digital Invoices using the ezinvoice.pk software!
Follow these steps to configure your company, items, buyers, and prepare and submit your invoices to the FBR system after successfully passing all sandbox scenarios.
Step 1/4 Update Company with Production Token
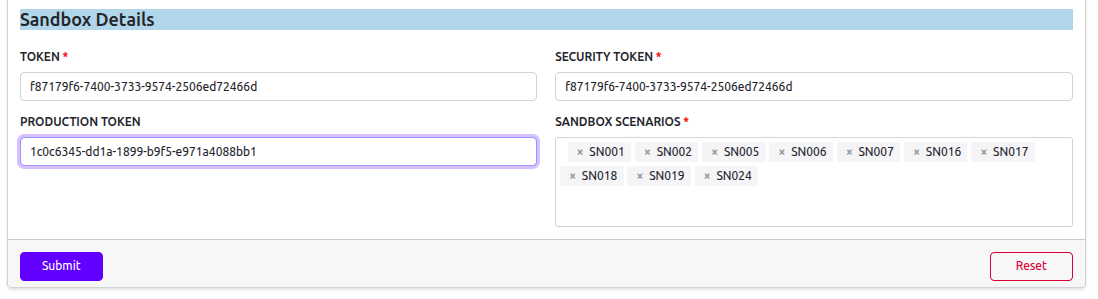
- Once your company is registered and all sandbox scenarios are passed successfully, you will receive a new "production environment token".
- Navigate to your company details via the Companies menu.
- Update your company details by providing the new token received.
- Press the Submitt button to save the record.
Step 2/4 Add Company Products / Items
This process covers viewing the items list, utilizing the HS Code search feature, and adding new product records.
Access Items List
- Click on the Items menu of the left side bar.
- This will display the list of all company products/items. Initially, the list will be empty.

Empty Items List
Add New Item Record
- Click on the
 button.
 - Fill the item form with the required details, including the HS Code.
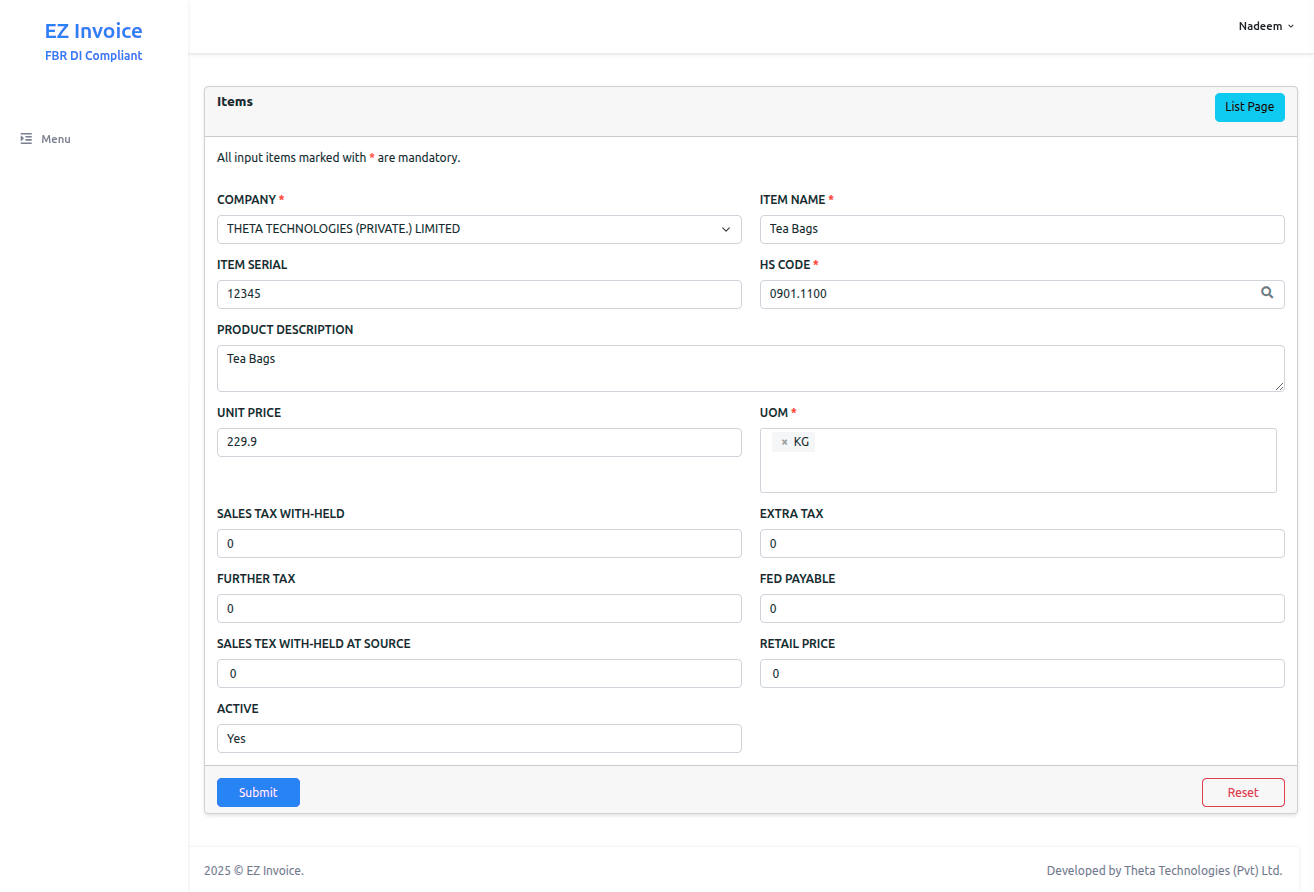
Filled Item Form
Utilize HS Code Search Feature
- When adding or editing an item, click on the "search icon" placed within the "HS Code" input item.
- A popup window will open with a list of all HS codes and their descriptions.
- You can "search" for a particular item by typing text into the search input item, which will filter the matched records.
- Press the Select button against any HS Code record to automatically place the selected code into the relevant input item.
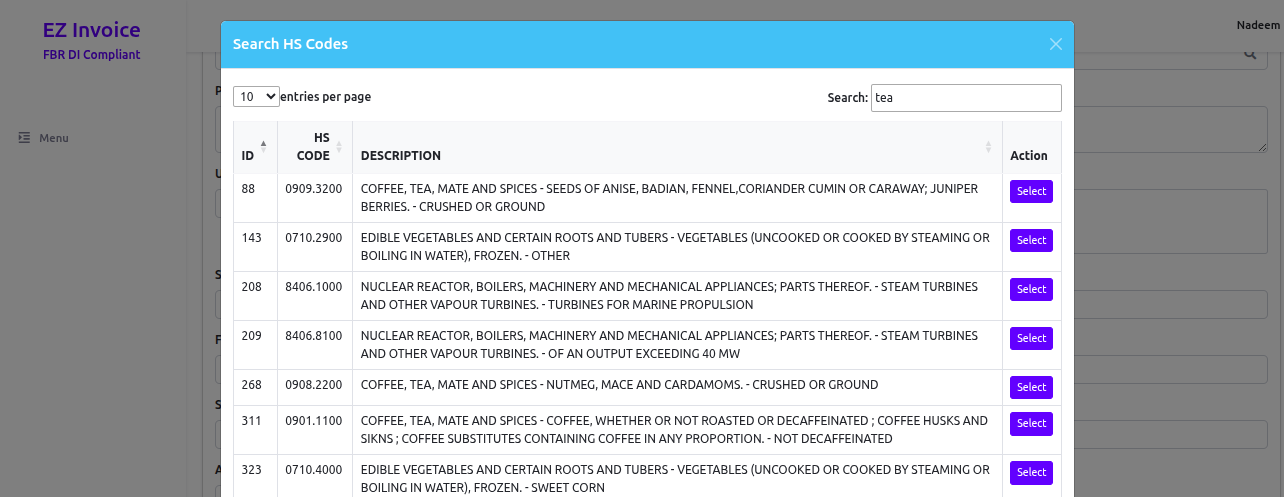
HS Code Search Popup
- Press the
 button to save the record.
Step 3/4 Add Buyer Information
- On the left side bar, click on the Buyers option.
- This will open a list of all buyers under your account. Initially, the list may be empty.

Empty Buyers List
- Click the button (or equivalent) and fill out the form with all the necessary buyer information.
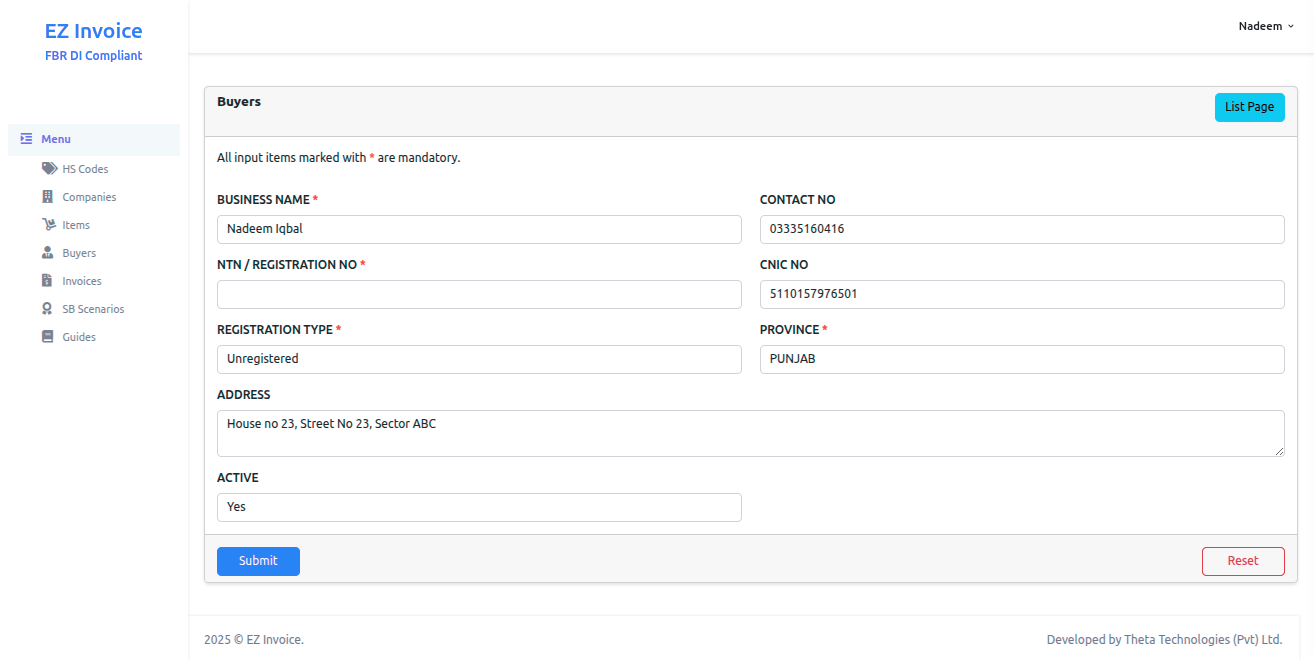
Filled Buyer Form
- Press the button to save the record.
Step 4/4 Prepare and Submit Invoice to FBR
- Click on the Invoices option of the left side bar.
- This will open a list page with all invoices under your account. Initially, the list will be empty.

Empty Invoices List
- Click on the button to prepare a new invoice.
- Fill the form with all necessary inputs. You can add "multiple items" to the invoice.
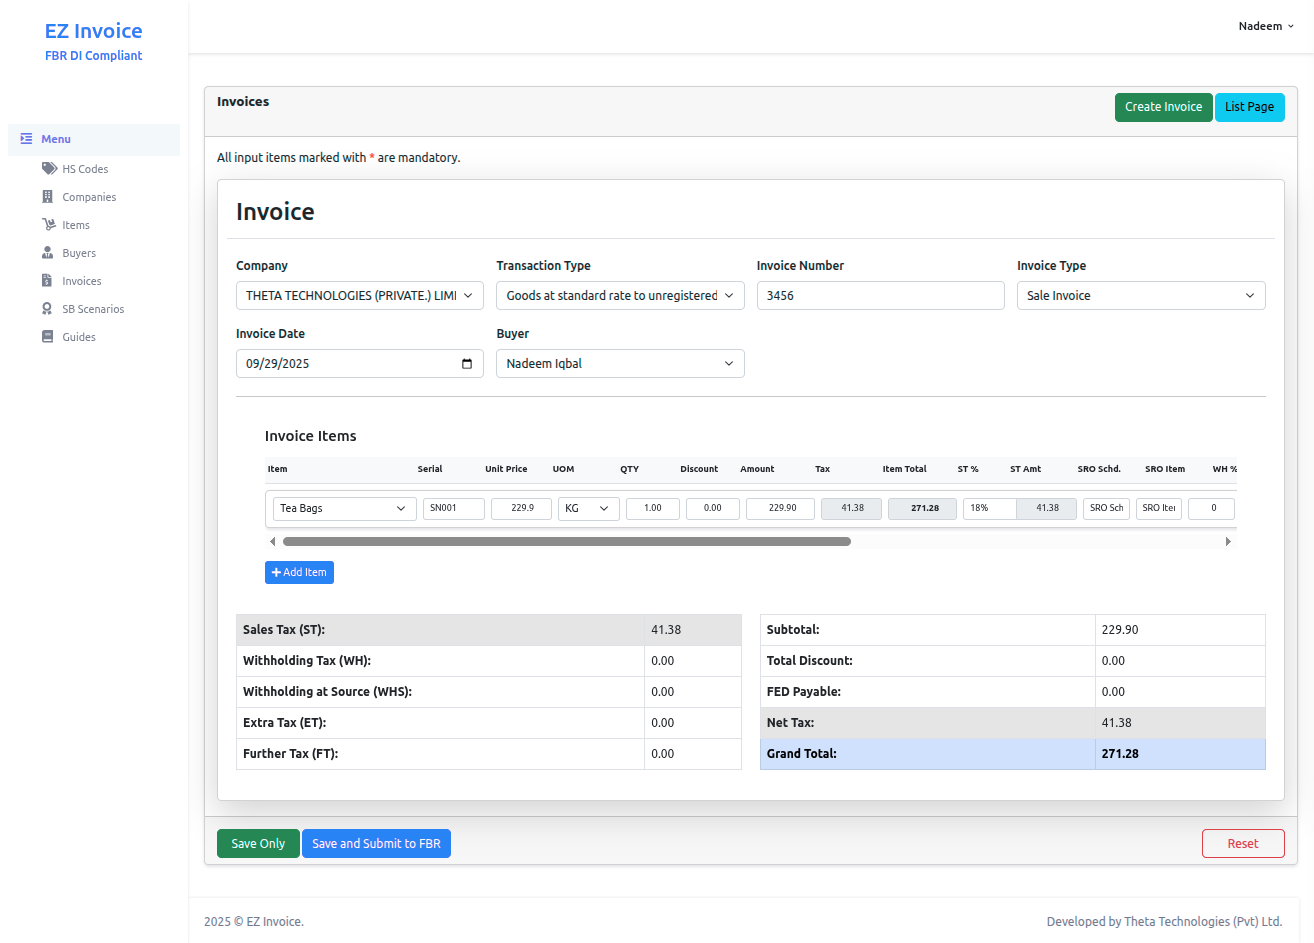
Filled Invoice Form
- You have two saving options:
- "Submit directly to FBR" (includes saving the data).
- "Save only" without submitting it to FBR.
- Once an invoice is "submitted to FBR", the system will save the "FBR generated invoice number" against the invoice record.